KAGURA has two modes, a “Creator Mode” for creating Songs and a “Performer Mode” for performing Songs (kpl files) . “Creator Mode” also has two submodes "Scene" and "Timeline”.
Here, we will explain how to actually use each mode in detail.
We will also explain the MIDI function that can connect KAGURA with other equipment and software to have them work together.
Creator
Scene and Timeline
You can create Songs by placing Icons on the Screen and assigning sounds to them. This one screen is called a Scene. The Scene is the smallest unit for music production in KAGURA, and the submode to edit the scenes is called the Scene submode.
By arranging the Scenes in order on a time axis, you can make variations in the performance. The mode to arrange this scene is called the Timeline mode.
Switching between the Scene sub mode and Timeline sub mode can be done at the top of the screen.
- The Creator Mode is available only in the Pro version.

Creator “Scene mode”
In the Scene submode, you can do the following: Icon and Block arrangement & setup, create loop material, modify the BPM, beat, etc. These are all elements which can be assembled in order to create a Song. You can also create, copy, and rename multiple Scenes.
Screen Structure (Scene mode)
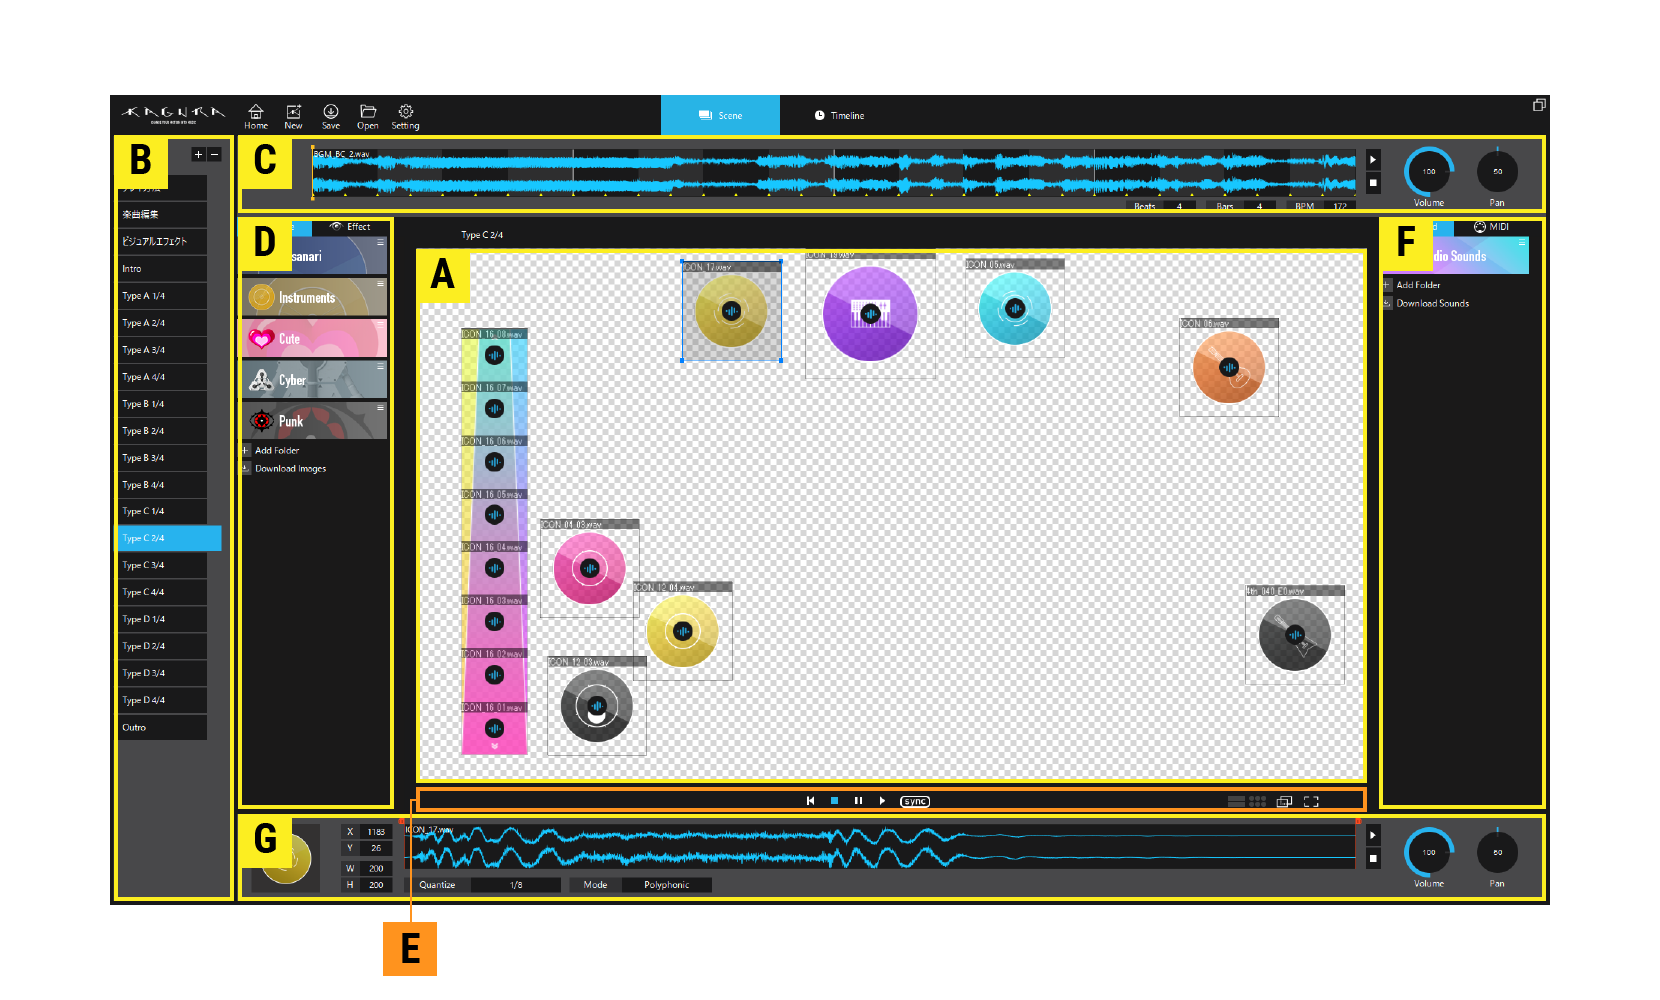
A.Main Area
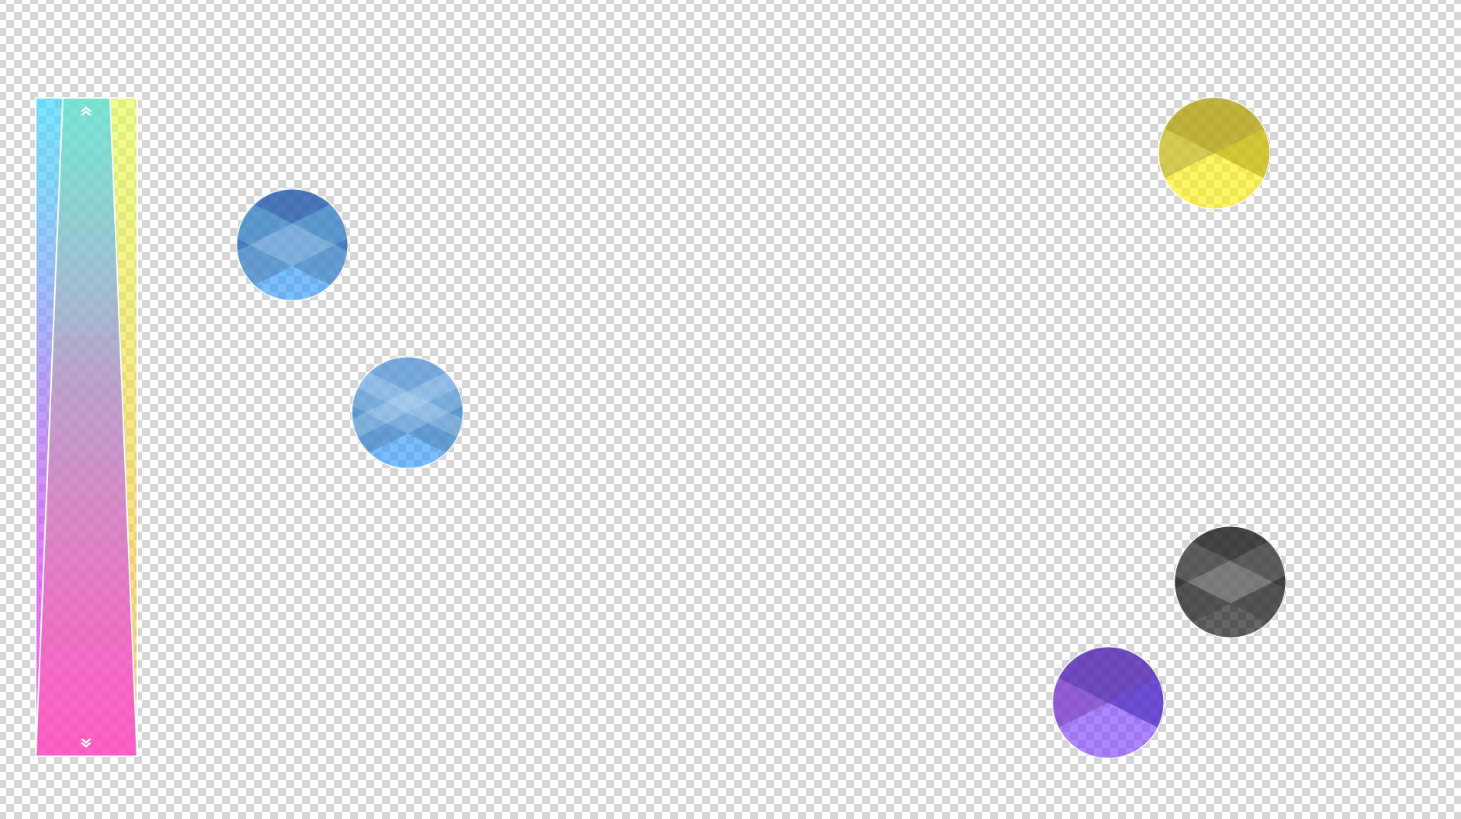
This screen is displayed when playing.
If the camera image is too dark, too bright, not displayed, please adjust it from the Device settings in the Settings toolbar.
You can also fine-tune and check the reaction sensitivity in specific environments. There are various adjustable elements in the Settings menu.
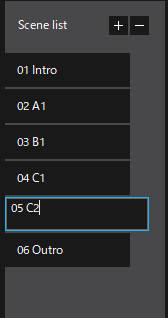
B.Scene List Area
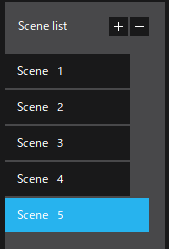
This is basically a list containing the Songs. You can create, edit, copy, delete, rename, sort etc. You can also re-create and edit a copy of an already existing Scene.
Please press the “+” button on the upper right corner of the Scene List Area to create a new Scene.
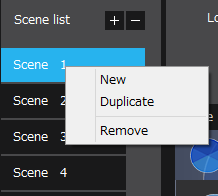
To delete a Scene from the Scene List, right click on the Scene and select "Delete". Also, you can delete it by pressing the “-” button.
Double-click a Scene to rename it.
You can duplicate a Scene by right-clicking it and selecting Copy.
You can rearrange the Scenes by using drag & drop.
Caution!
- Rearranging the Scenes in the Scene List will not affect the Timeline.
- Deleted scenes can not be restored. Please backup and save your scenes before you do any operation.
# [Production tips]
Prepare Scenes that represent the intro, verse, chorus etc. of a Song and make the flow of the Song. If you want, you can change the name of a Scene so that the it is easy to recognize when production progresses to a certain extent, so you can tell which Scene contains which part of the Song.
# [Production tips]
If you want to create multiple similarly configured Scenes, you do not need to make the same Scene from scratch again. If you copy a Scene, you can recreate it with all of its icons. If necessary, you can delete icons or replace the loop sound source, etc.
C.Loop Area
In KAGURA, in addition to generating sounds by touching Icons, loop material can be played in the background. You can also set a Scene's beat values, measures and BPM values here. The settings made here will affect the quantization settings that affect the sound generation timing when touching the Icon.
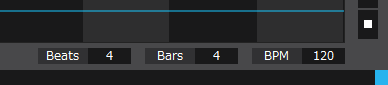
Looped audio material can be placed in the Loop Area using drag & drop. Please prepare the loop material in .wav format. You can also adjust the playback volume and pan of the loop material in the same area. In addition, the Loop Area displays the timing of the selected Icon's quantization. A yellow marker is displayed at the quantized position of the selected Icon.

Quantize 1/8

Quantize 1/2
# [Production tips]
The sequence from the beginning to the end of the prepared .wav material is played back in a loop. Please edit it using a different waveform editing software etc. so that there is no unnecessary sounds in the material.
Also, during KAGURA's Song production, Loop material does not necessarily need to be used. Of course it is possible to create a Scene that plays everything with only the the touching of Icons you have placed or to do a live/jam session with other instruments.
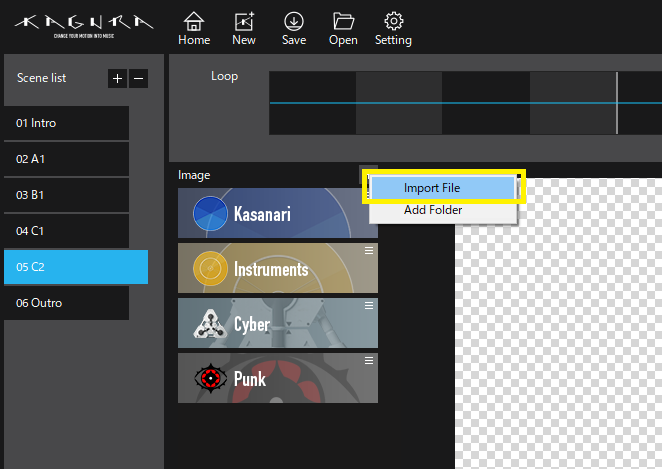
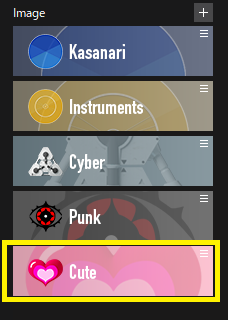
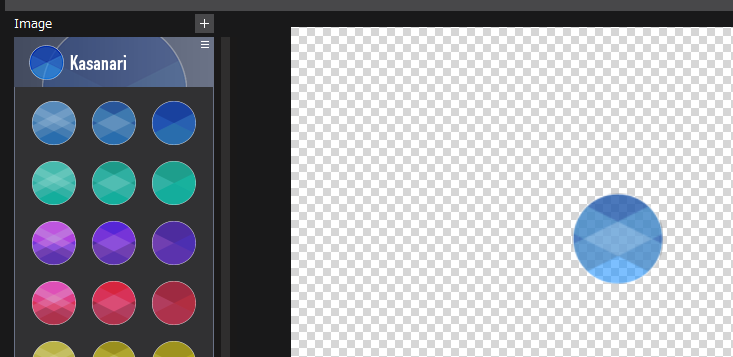
D.Image Area
This area is used to manage images used as Icons. Here, you can also load a package (.kip file - which stands for KAGURA Image Package) that compiles several images together.
How to install image material package (kip file):
# Step1

Click the button.
# Step2
Select "Import files".
# Step3
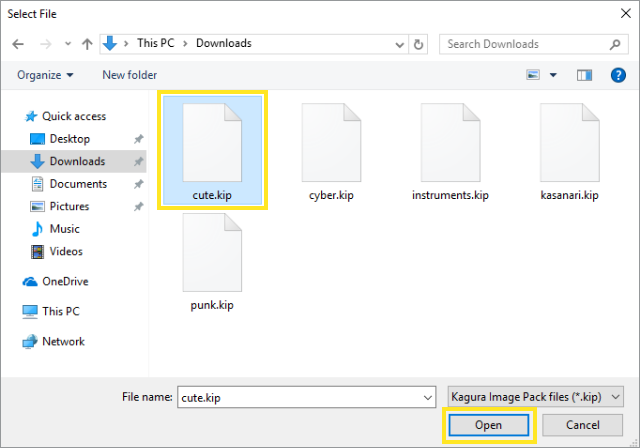
Select the "kip file" you want to install and click "Open".
# Step4
A new banner will be added. Clicking the banner will display a list of icons in the kip file.
# [Production tips]
You can also use images only as Icons, without assigning it any Sound or MIDI data. In this case, no visual action will occur even if you touch the icon during the performance, the image is simply displayed. For example, you can display titles in an intro scene, apply vignette effects on the screen, or use them in a variety of other ways.
# Icon
It is an object which can be assigned one Sound (Audio / MIDI).
# How to make an Icon
Select an image from the Image Area and place it in the Main Area using drag&drop. Select the sound you want it to play from the Audio tab of the Sound Area and drag & drop it onto the image you had placed. Now you have one Icon on the screen.
Let's look at the settings of the Icon in more detail.

Clicking the Icon displays the details in the Properties Area.

You can listen by pushing the play button next to the waveform or double-clicking on the waveform.
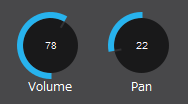
You can also set Volume and Pan here.
The size of the Icon can be changed freely by operating the handle displayed when selecting it.
You can check the current status while the icon is selected.
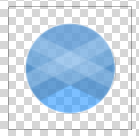
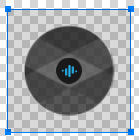
Icons that have not been assigned any sound
Icon which had been assigned an Audio file
Icon assigned a MIDI message
# [Production tips]
The most important setting of the Icon is placement and quantization.
This placement of icons is an element unique to KAGURA. Deciding where to put the icons is vital. You have to take into account the position where the hand can reach easily or not. For example the sounds to be played only at key points should be on the outer part of the screen so they are not touched by mistake etc. This is similar to the placement of each instrument in the drum set.
Quantize is an indispensable setting to make "sounds" sound as "music". For modifying the settings of the quantizer, please check the settings in the Properties area.
# Block

While the Icon is assigned a single sound for each image, the Block is an Icon which can be assigned multiple sounds (Audio data / MIDI message) by dividing the image into single sound chunks.
# How to Make a Block
Select an image from the Image Area and drag & drop it to the Main Area. By setting the division in the Properties Area, you can change the number of frames according to the number of sounds you want to place in the block.
Same as with the Icon, assign sounds by arranging them using drag & drop from the Audio Tab. You can place one sound for each frame. The values in the Properties Area are reflected in all the sounds in the Block. [→ Properties Area]

A Block in which Audio and MIDI are arranged at each position in 8 divisions
# [Production tips]
Blocks are very effective to use for melodies. If you place the sound at the scale that matches the Song, the melody will sound good.
Also, using the Monophonic setting, Icons will only be able to play one sound in the entire block at a time. The sound in the Block that was ringing until then gets canceled. It is also very convenient for long notes, hi-hats, scratch and collage sounds.
E.Control Area

Displays the BPM of the song, play/stop buttons, “enter fullscreen mode” button and “multiple screens output” button.
# BPM Display

You can change the BPM while playing:
-
When using a mouse with a wheel
- by turning the wheel up and down;
-
When using gestures
- bring your hand closer to the camera and hold your thumb up, the BPM will rise; if you hold your thumb down, the BPM will go down.
The BPM change made here is a temporary change, only taking place during the performance.
# Stop / Play Button

Play and stop playing using these 2 buttons.
In Scene Mode, the selected Scene is played in a loop.
While playing, you can also move Icons, change the Volume, Pan, Quantize settings, so you can adjust the overall balance while playing.
In Timeline Mode, playback starts from the point selected on the Timeline to the end.
# Screen Generalization Button

Only the Main Area is displayed on the monitor in fullscreen. Full screen display can also be done with shortcut keys. It is necessary to operate with the shortcut keys (Esc) to restore from the full screen.
# Shortcut Keys for Screen Generalization
- Main Area Full Screen Mode: [F11]
- Hide Toolbar Full Screen Mode: [Ctrl] + [F11]
- Exit Full Screen: [F11] or [ESC]
- Main Area Full Screen Mode: [⌘ F]
- Hide Toolbar Full Screen Mode: [shift] + [⌘F]
- Exit Full Screen: [esc] or [⌘F]
# Multi-screen output button

When holding a live performance, there are cases where you want to display only the Main Area so that the video seen by the audience is a clean area, while the performer can still see the normal Edit Screen. In that case, pressing the Multiple Screen button opens the subwindow of the Main Area.
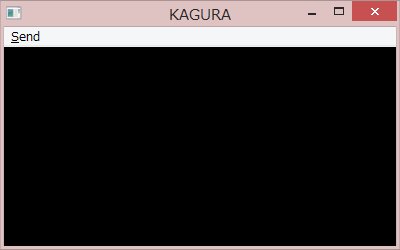
When multiple display screens are connected to the PC (extended displays), pressing [Send] will show the number on each display. When you specify the number shown on the display, the Main Area is displayed on the large screen on the selected display.
Caution!
- A display containing only the main unit can not be selected.
- The main screen can get stretched, so please pay attention to the aspect ratio of the monitor.
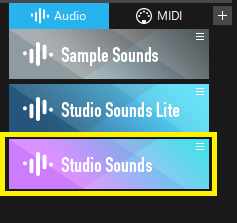
F.Sound Area
It is an area that handles Audio material and MIDI data. To use the sound material, select the Audio Tab and for MIDI use the MIDI tab. Settings menu for each tab will be displayed in here.

# Audio Tab
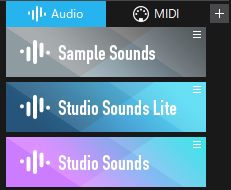
It is a list of imported audio materials.
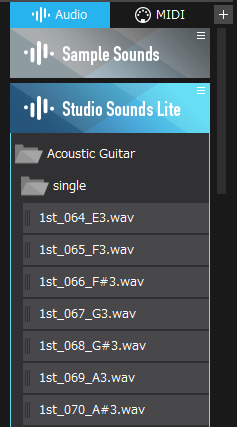
You can add / delete packages (ksp file) and personal folders.
When you select a banner in the Sound Area, various sound files are displayed. You can listen to the sound by double-clicking on the banner.
Clicking again stops playback. Once you've decided on a sound file, you can assign it to an Icon by dragging and dropping it onto the Icon.
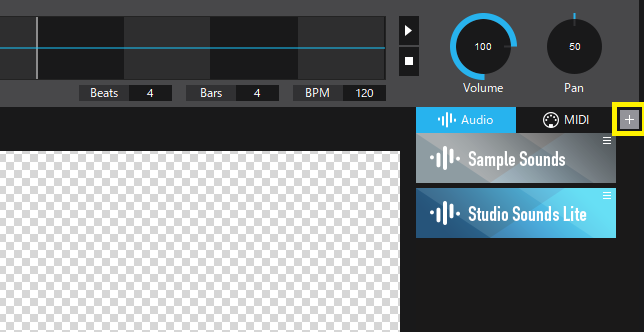
# How to install sound material packages (ksp files)
# Step1
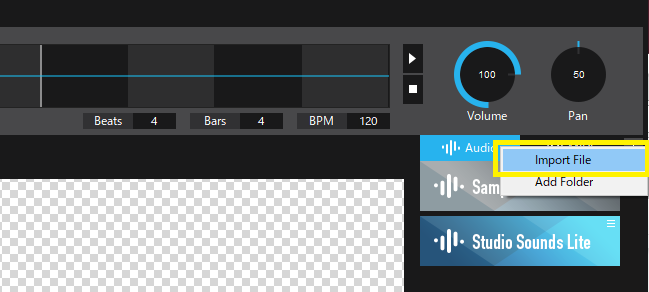
# Step2
Select "Import files".
# Step3
Select the "ksp file" you want to install and click "Open".
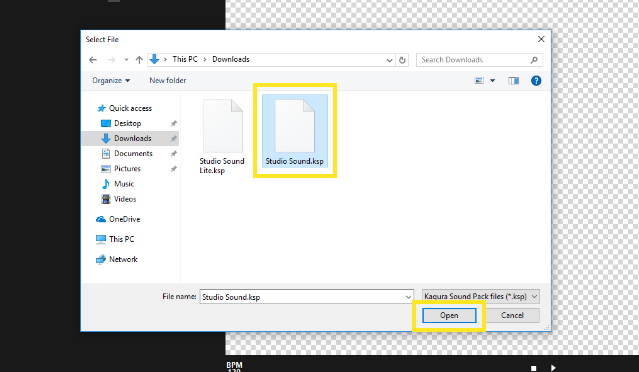
# Step4
Check if a new banner has been added.
# MIDI Tab
This is a tab for assigning MIDI sounds and “Control Change” signals to Icon.
You can set parameters for the MIDI sounds and ”Control Change” messages and assign them to the Icon using drag & drop.
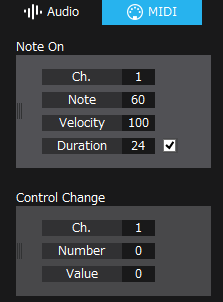
You can specify the length of the note by setting up the "Duration". The “Note OFF” signal will be output according to the entered numeric value. Use it to play sounds that require a “Note OFF” signal, such as long notes.
G.Properties Area
This area is used for setting up detailed features of the Icons and Blocks of the Main Area. Detailed information on Icons and Blocks in selected state is displayed and can be changed at any time.
# Audio Icon
In the case of an Icon which has been assigned an Audio sound, you can modify the numeric designation of coordinates and sizes, change the quantization value, change the playing method, trim the waveform, preview play, and adjust volume & pan.

# MIDI Icon
In the case of Icons which have been designated MIDI data, the display differs from an Icon with Audio sounds. Please check the “About MIDI” section for details.

# Waveform display

The waveform of the sound material assigned to this Icon is displayed. You can also trim the sound here. You can trim only the part you need. Please specify the range with 2 sliders.
# [Production tips]
The waveform of the sound material assigned to this Icon is displayed. You can also trim the sound here. You can trim only the part you need. Please specify the range with 2 sliders.
# Quantize
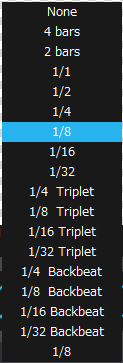
KAGURA is a software which is played by touching an Icon or by sending a MIDI signal, but there is also a quantizing function to help set the sound generation timing sync with the tempo of the Song.
- None... No quantization. The moment you touch the icon, a sound is produced.
- 4 bars... produces a sound every 4 bars
- 2 bars... produces a sound every 2 bars
- 1/1… produces a sound at each note
- 1/2... produces a sound at every half note
- 1/4... produces a sound at every quarter note
- 1/8... produces a sound at every eighth note
- 1/16... produces a sound at every sixteenth note
- 1/32... produces a sound at every thirty-second note
- 1/4 Triplet... produces a sound at every quarter note triplet
- 1/8 Triplet... produces a sound at every eighth note triplet
- 1/16 Triplet... produces a sound at every sixteenth note triplet
- 1/32 Triplet... produces a sound at every thirty-second note triplet
- 1/4 Backbeat... produces a sound at every quarter note backbeat
- 1/8 Backbeat... produces a sound at every eighth note backbeat
- 1/16 Backbeat… produces a sound at every sixteenth note backbeat
- 1/32 Backbeat... produces a sound at every thirty-second note backbeat
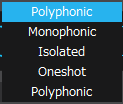
# Mode
Setting the playing method of the Icon.
-
Polyphonic
- No matter how many times you touch an icon, they will be played all at the timing of the set quantization.
-
Monophonic
- No matter how many times you touch an Icon, it will sound at the timing of the quantization, but the sound that was playing before it will stop. In MIDI, the “Note OFF” signal is canceled even if the Duration setting is on.
-
Isolated
- Once you touch the Icon, you will not be able to touch it again until the sound is finished. In this case, the sound is finished when the wave file finished playing. If you play back to the end, or if you are trimming, it will be restricted so that the next note can not be played until playback of the trimmed sound is completed.
-
Oneshot
- You can touch this Icon only once. In the Timeline, it will move on to the next Scene. (When two identical Scenes are arranged in the series, the Icon will be restored to its initial settings)
# [Production tips]
In order to be able to touch the Icon set as Oneshot again, it is necessary to change the scene.
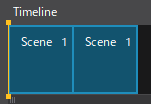
In the above figure two Scenes are lined up, but once you move to the second Scene you will be able to touch the Icon again.

In the above figure, Scene 1 is repeated twice using the “repeat” setting. In this case it is not considered a scene transition and the Icon can only be touched once.
In case of Blocks
In the case of a Block, Division (division number) and Orientation (division direction) can be set in addition to the Icon parameters.

Change Division
Division: 8

The grid of the Block is divided into 8 divisions.
Division: 4

The grid of Blocks is divided into 4 divisions.
In the case of MIDI

You can change “Note ON” and ”Control Change” details. You can actually test the output signal with the playback button. For details, see ”About MIDI”.
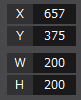
# [Production tips]
The position and size of Icon and Block can be changed by dragging them around the Main Area, but 'X (horizontal position)' 'Y (vertical position)' 'W (width)' 'H (height) It is also possible to change. Please use it when you want to set accurate numerical values such as syncing the sizes of multiple Icons or arranging them cleanly.
Creator “Timeline Mode”
In this Mode you can create a "Timeline" which contains the overall composition or a .kss file. You can set the time flow of the set, Scene jump etc with a trigger.
Screen Structure (Timeline mode)
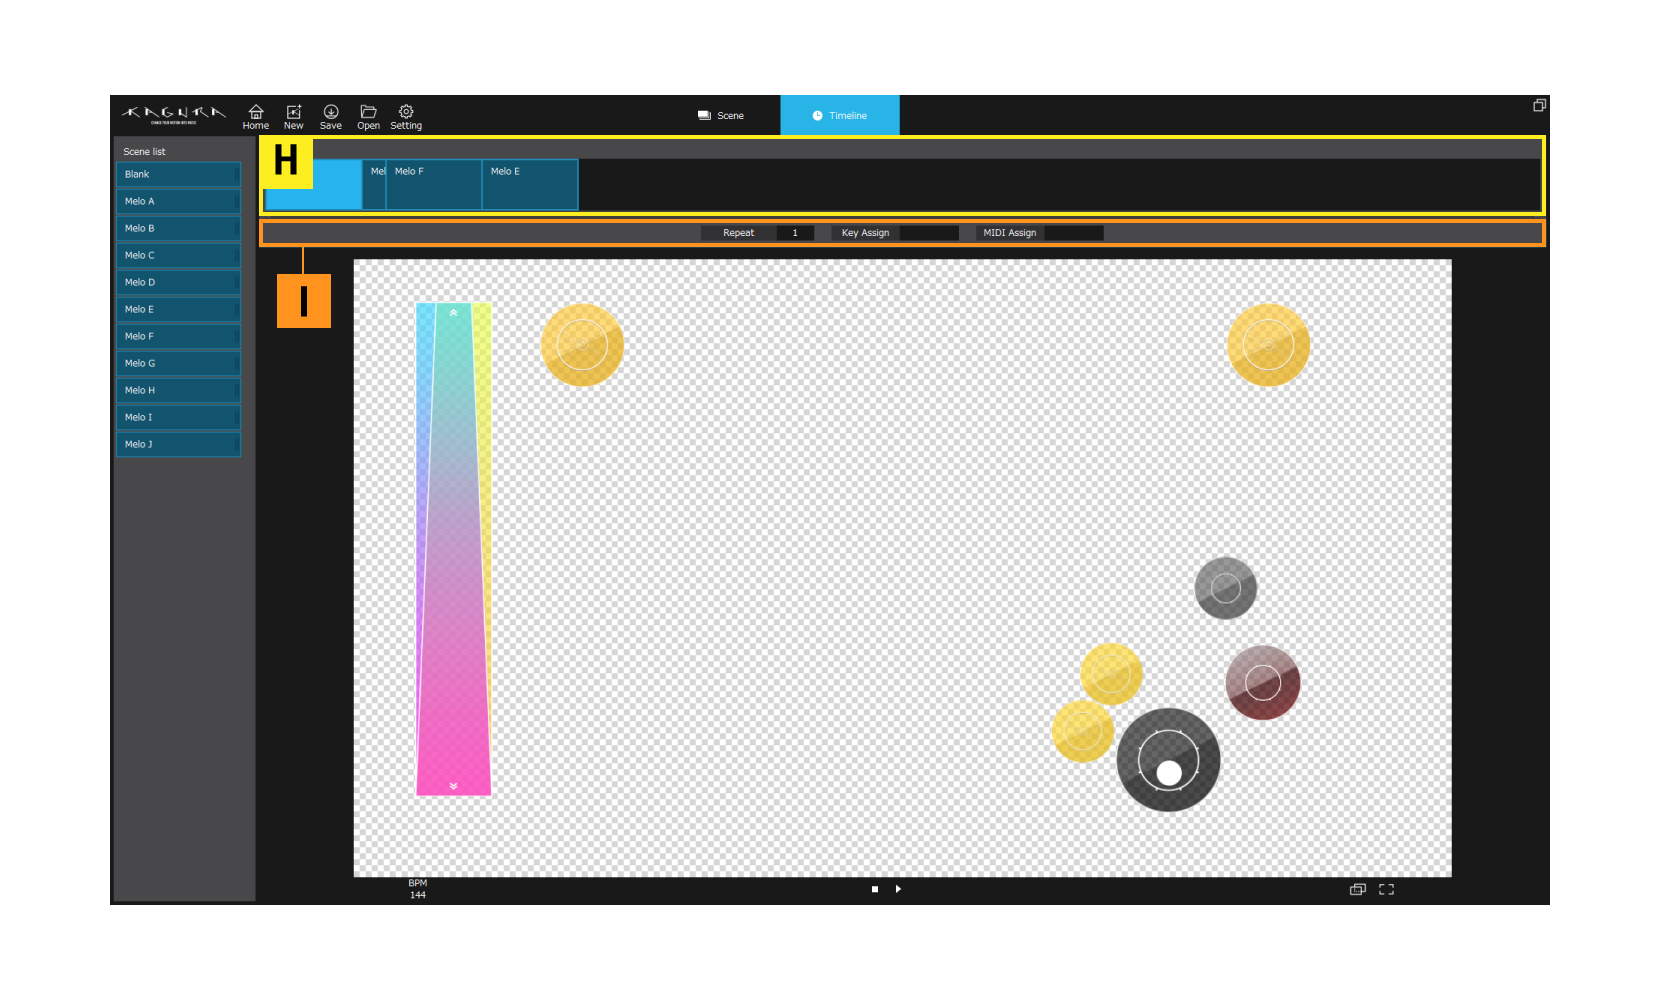
H. Timeline Area

It is an area that holds arranged series of Songs in chronological order. Drag and drop from the Scene List.
-- How to make a Timeline --
Drag and drop the Scenes from the Scene List to the Timeline Area and arrange them.
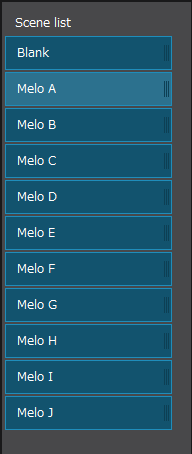
# Scene List
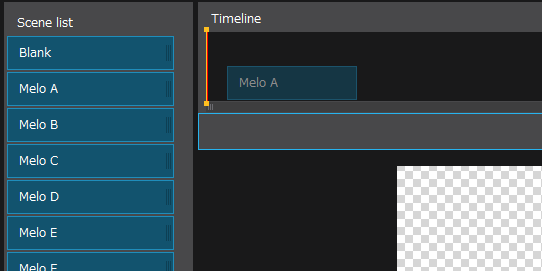
Drag and drop from the Scene List to the Timeline
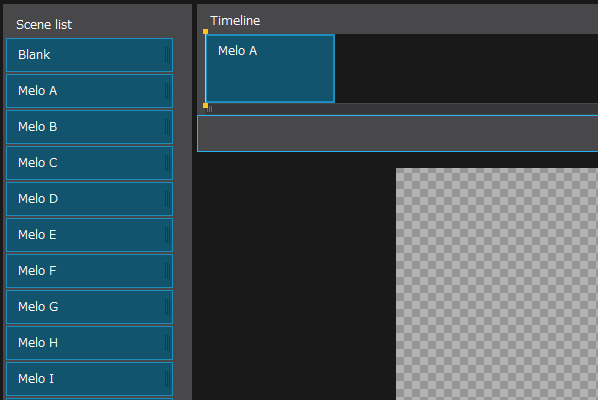
A Scene is placed on the Timeline
You can change the repeat count in the “Repeat" box in the Properties Area.

KAGURA's Song is now complete!
It is possible to return to the Scene Mode again after Timeline production and adjust the Scenes. Don’t be afraid to modify the scenes as many times as it takes to make a perfect song.
# [Production tips]
When the Timeline becomes longer, you can change the expansion ratio by dragging the scroll bar.
# [Production tips]
About the difference between placing the same Scene side by side and setting the Repeat number:
When placing the same Scene side by side, the information will be reset when the Scene is switched. Icons moved by using gestures, Icons added by the recording function, changed tempo, etc. are returned to the default state of the initial Scene. Moving the repeat Scene is not considered as a switching of Scenes.
I. Properties Area
This area is used to set the parameters of a Scene placed in the Timeline. You can edit the selected Scene.

# Repeat:
Set the number of repetitions of the same Scene. When “∞(infinity)” is set, it will loop infinitely.
# Key Assignment:
You can jump to any Scene by using keys. The key you typed is assigned immediately after selecting [Key assign]. The Scene change timing is after the end of a Scene being played when the key is pressed.
# MIDI Assignment:
You can jump to any Scene using the value number of the CC (Control Change). Input from the external MIDI keyboard etc. is assigned immediately after selecting [MIDI assign]. Scene switching timing is similar to the Key assign process.
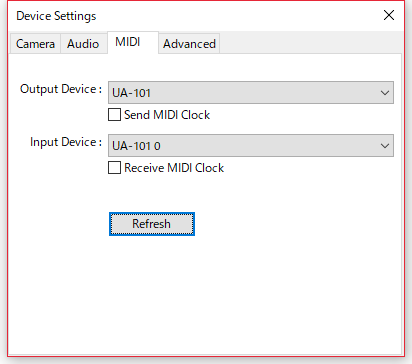
# MIDI assign:
Please refer to Device Setting for MIDI settings
About MIDI
KAGURA is compatible with most MIDI devices. By using MIDI, you can connect to an external MIDI opening up a wide range of possibilities.
Send MIDI “Note ON” signal or Control Change
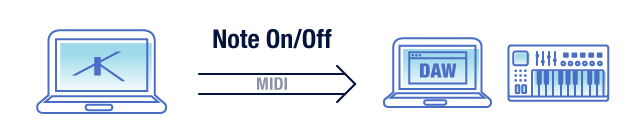
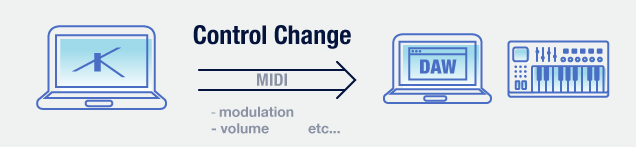
You can assign a MIDI message to an Icon or a Block and send ”Note ON” or ”Control Change”.

Open the MIDI settings from the settings toolbar and select the MIDI interface of the output
Drag & drop images from the Image Area to the Main Area
Switch the tab of the Sound Area to MIDI and enter a value.
Drag & drop the “Note ON” box or “Control Change” box on the Icon.
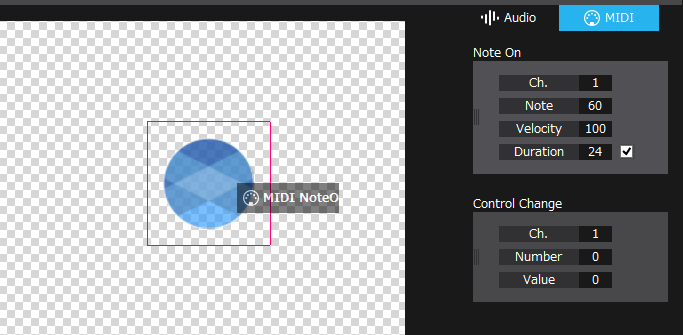
The Icon is now able to send MIDI messages.
As with any Audio material, MIDI Icons, you can make various adjustments from the Properties Area. You can also change all the values decided on the MIDI tab.
-
About Duration
- When checking the checkbox of Duration, the “Note OFF” signal will be sent after the setting time value has elapsed after sending the “Note ON” signal. The set value becomes the number of ticks (quarter note = 24 ticks)
Synchronize two (or more) KAGURAs

You can synchronize the tempo and Timeline by synchronizing the PCs on which KAGURA is installed.
Setting of MIDI clock sending side (Master)
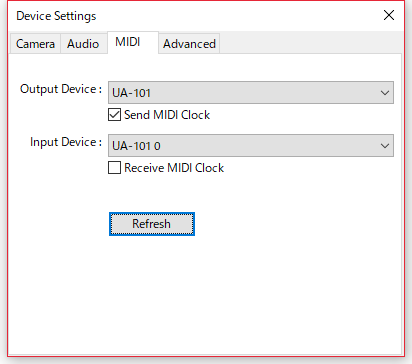
Check Send MIDI Clock.
Setting of MIDI clock receiving side (Slave)
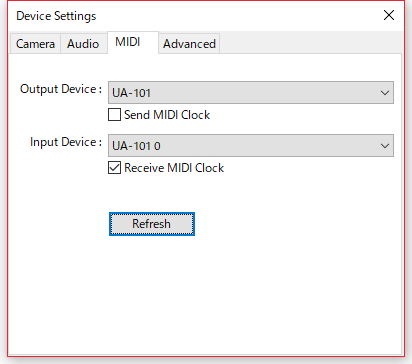
Check Receive MIDI Clock.
-
By using a mappable MIDI interface etc, it is possible to connect multiple units on the Slave side.
-
The Slave PC can not be played by itself. Timeline does not progress even if you press the play button. If you want to play alone, please uncheck Receive MIDI Clock.
-
To start synchronization, play all slave PCs and then play the Master PC. All KAGURAs play at the same time.
Connect KAGURA with other DAWs and synchronize
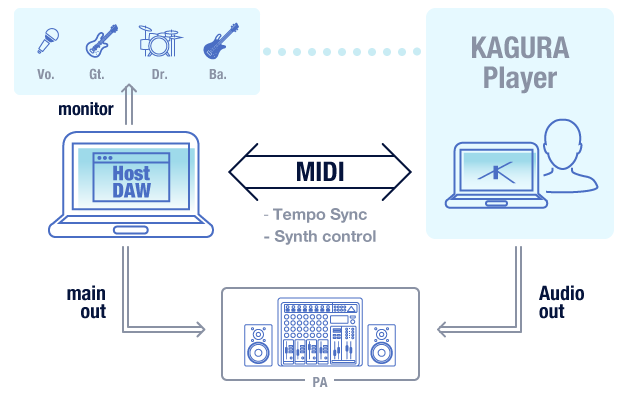
You can connect KAGURA to another DAW and incorporate it into the band's synchronized performance.
When KAGURA becomes the Master and sends the MIDI clock to the DAW device
It is effective when you have a performance which uses KAGURAs only and it needs to change tempo in real time. DAW can be used in cases such as arpeggiator or other sounds that match the tempo.
When DAW becomes Master and sends MIDI clock to KAGURA
It is used when incorporating KAGURA into a synchronized performance.
In addition to the tempo, the Timeline on the DAW matches the Timeline on KAGURA.
- If it exceeds 1024 measures, clicking on the position exceeded on the DAW will not be reflected correctly. This is due to MIDI specifications.
Move KAGURA's Timeline with MIDI reception
KAGURA's Timeline can be triggered by a key or MIDI to change the play position.

In Timeline Mode, select the Scene you want to set on the Timeline.

When the MIDI signal is input into KAGURA within the frame of a selected MIDI Assign, the trigger signal is assigned. With this, you can move to the Scene when the signal set during playback is input.
- The Scene change timing is after the Scene when the signal input is completed.
Player

It is a screen specialized for live performances etc.
It can read the Setlist file and load it for each Song individually. You can also save a new Setlist you have edited.
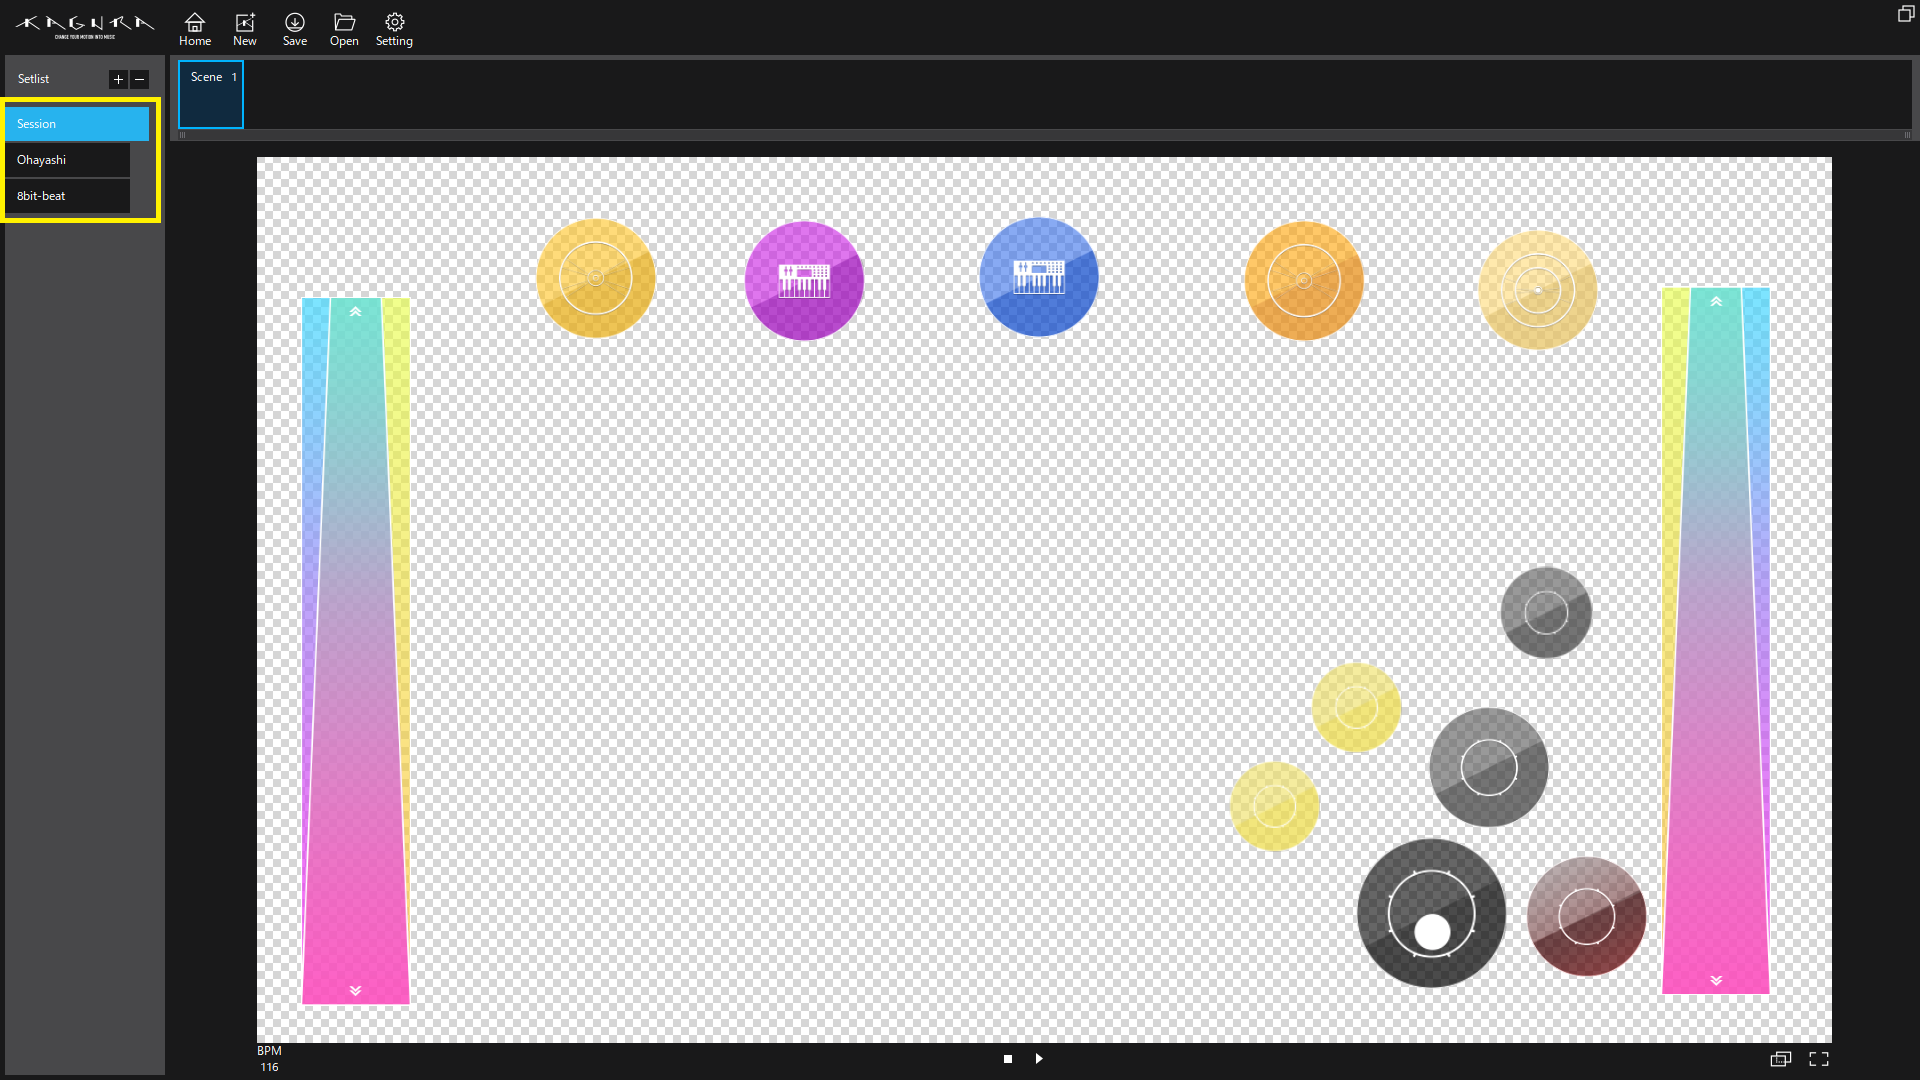
Playlist Area
It is a list of Songs to play.
Read the set list file (kpl)
Please press the [Open] button and select the desired kpl file.
How to create a Setlist
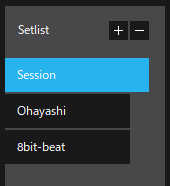
By pressing the [+] button in the Setlist area, it will read a .kss file. When a file is read, it is newly added to the Setlist. Delete it with the [-] button.
Also, you can swap the order of loaded Songs using drag & drop.
When you click the [Save] button, you can save the created Setlist as a .kpl file.
All .kss files are included in the .kpl file. Erasing or moving the original .kss file has no effect. Since the folder size is the sum of all .kss files, the load on the computer may become very large if there are too many files.
Playing a Setlist
When you select a Song in the Setlist, it will be played automatically.
You can stop by pressing the stop button or by selecting something other than the Song in the Setlist Area.
Timeline Area
This is the Timeline of the Song being selected / playing

This is the Timeline of the Song being selected / playing

Timeline of a Song that loops with only one scene
The Timeline of Songs is composed of several Scenes as a few minutes of music.
With such a Song, the Timeline is very useful to see which part of it you are playing right now. You can also play from the middle by clicking on the part you want to play.